

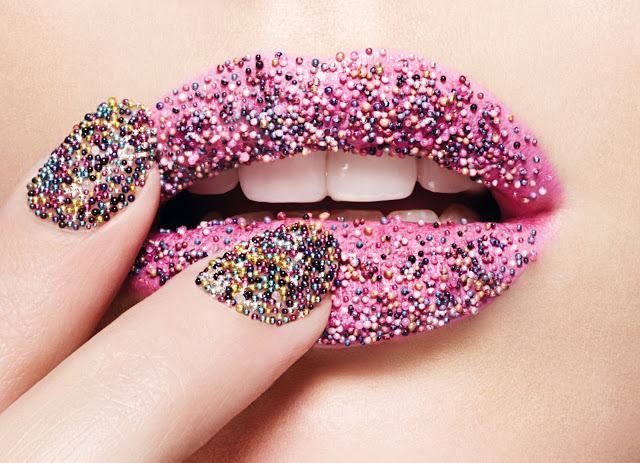
Hello everyone! A while back, I posted a Landmark haulin' and promised everyone a caviar nails review or tutorial. It took a while but here it finally issssss!
Like most people, this is only my first time to try caviar nails. Please forgive the ugly quality of my work. At least by now, I'm confident that I made all the mistakes there are to make and can pull off near-perfect caviar nails next time :)
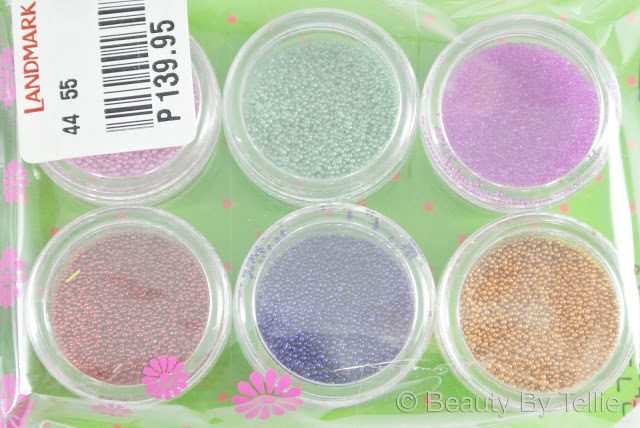 |
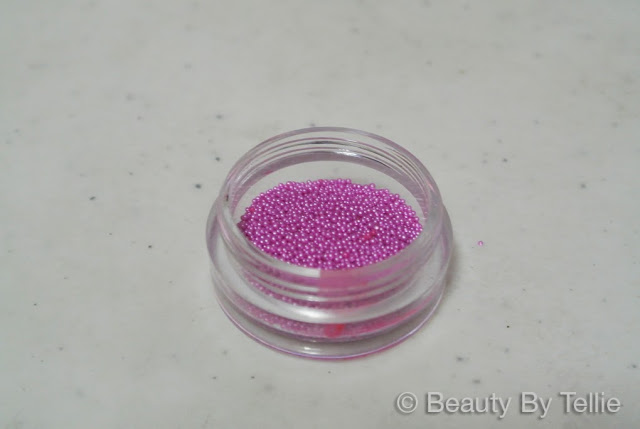
| Amie Magic Beauty Caviar Beads Php 139.75 / 6 color-pack from Landmark, Trinoma. |
The sacrificial lamb I anointed for my experimental / learning phase is the pink shade at the top left of the pack. I was choosing between pink and fucshia (top right) because they kind of looked the same and were therefore really the only dispensable ones. I ended up with the pink because I didn't want to waste the fuchsia's unique, glassy beads on a horrible beginner's mani.
Read on to find out how to make your own caviar nails :)
Here's What You Need:
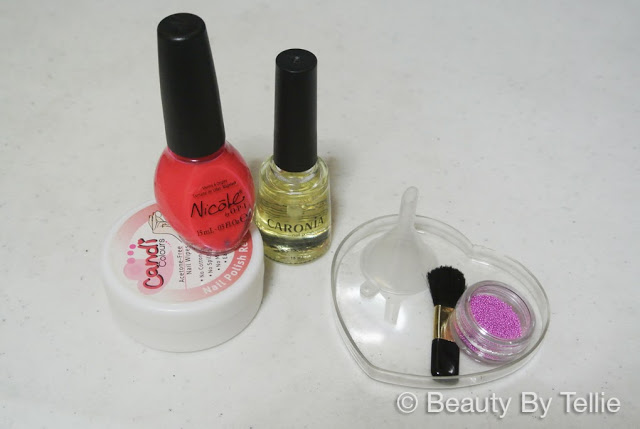 |
| Caviar Nails: Materials Needed |
From Left to Right:
- Acetone Wipes - for clean up
- Nail Polish - ideally, a color that contrasts or compliments the beads'
- Top Coat - optional
- Funnel
- Small Brush - for clean up
- Caviar Beads
- Rimmed Dish - to catch the excess beads
 |
| An Unlikely Pair: Nicole by OPI Find Your Passion and Fuschia Caviar Beads |
As you can see, I made my first mistake right away. I plucked Find Your Passion out of our manicure bag without looking at my caviar. I just remembered I picked pink. Errrr... I didn't remember the beads being a pinky violet :/ The pink polish I chose leaned a little too coral.
The two colors don't compliment each other. They are too similar but not similar enough, while being too different without being different enough- if you get what I mean.
I could get any other polish- IF I hadn't scheduled to do this at my bf's house :( I needed his help for the pictures and I couldn't keep putting it off so I went ahead anyway.
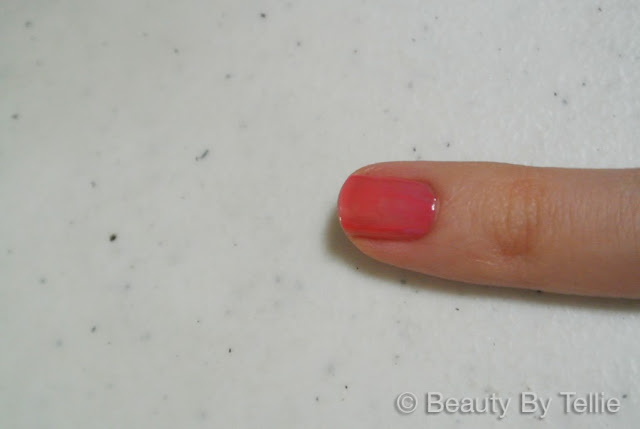 |
| One Coat of Find Your Passion |
Another thing I regret with my polish choice is that I forgot how streaky FYP applies. You can see a pretty thick streak at the bottom side of the picture yet most of the coat is see-through on other parts of the nail.
Here's How I Did It:
I did my depotting post
with a lot of research. This time around, I had NO IDEA what I was doing. I’ve
seen caviar nail sets and I guess you can infer how to use them but I never
really sat down and read cautions and tips from other bloggers.
It was pretty fun going blind!
STEP 1: PREP THE NAILS
The only prep-work I had to do was paint a base coat and one coat of color. I spread the second coat, one nail at a time, just before I put the beads on.
Here's the tricky part...
STEP 2: BEADS
BEADS METHOD 1: DIPPER-DI-DOO-DA
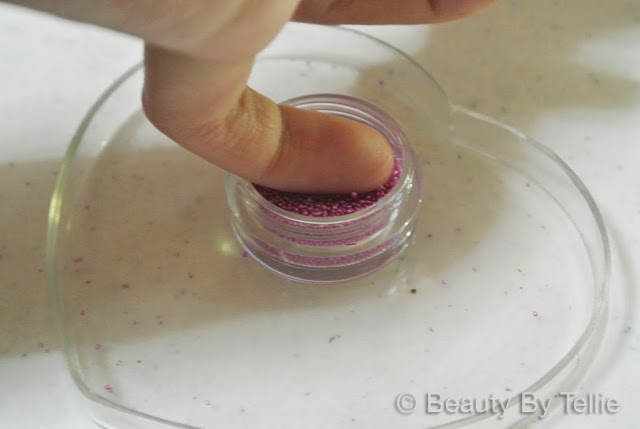
For my first seven fingers, I tried dipping my nails in the pot of beads. I thought it was quick, smart and mess-free. However, doing so left my caviar mani with a lot of gaps. I guess without gravity acting in on it, the beads aren't pulled in enough to the wet polish.
I tried re-dipping my nail but nothing caught on. The gaps were too tiny and rolling my nail around the beads did nothing.
So I tried to catch beads with my perpetually sweaty fingers and press them onto the nail.
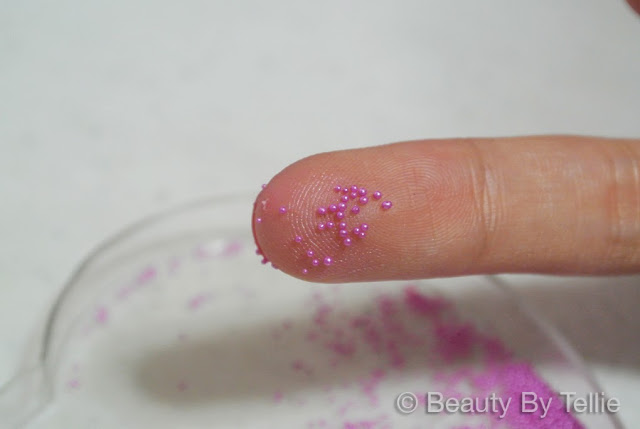
That kind of just rolled the beads around the still-wet polish and allowed my super-glue fingers to pick off even more beads.
I declare: DIPPER-DI-DOO-DA is a bust!
BEADS METHOD 2: HUMPTY DUMPTY
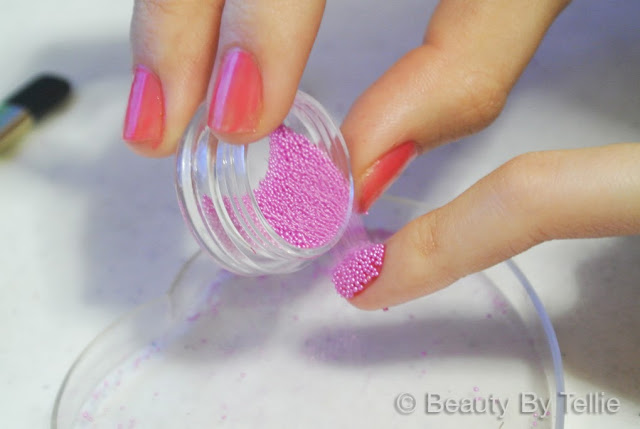
So I figured that gravity would give me a more even pattern and I was forced to do what I was dreading the most: spilling the beads over my nails.
It was more effective in filling up my nails with caviar beads but as the name suggests, Humpty Dumpty's fall was a quick and accidental deal. It was the pickup that was a nightmare and I wish I had all the king's men to do this for me.
All the beads that didn't stick to your nails? You have to funnel them back into the small jar, for each nail or two. Seems like a pretty simple task but when you consider how volatile these tiny, bouncy beads are, you will probably swear off caviar nails FOREVER!
PROTIP: Pour slowly so the beads fill in more "perfectly."
So when that's done...
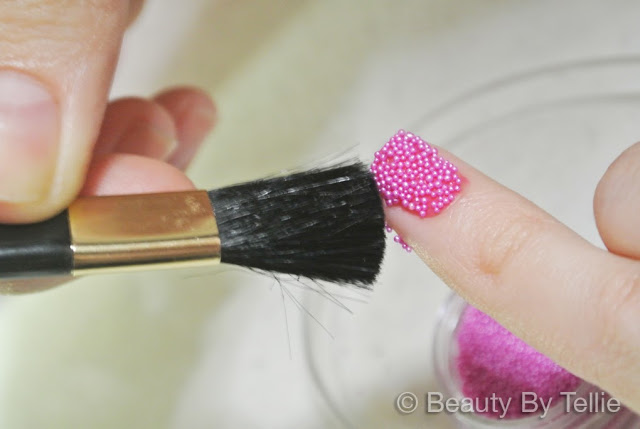
STEP 3: CLEANUP
Use an old brush (I used the mini-brush included in the palette I depotted here,) to sweep off excess beads that are on your skin or a little bit outside of your nail.
This is the finger I dipped and you can see the bare spots I was talking about. I tried pressing beads onto the nail using my finger but I just picked up beads from other spots.
STEP 4: BEADS CLEANUP (OPTIONAL)
After a few nails, I started to see some stained beads in my jar. I didn't know if I got them from doing DIPPER-DI-DOO-DA or HUMPTY DUMPTY but in any case, it's pretty simple to fix them.
With a moist finger, pick up the stained beads. Roll them a few times around a polish remover-soaked pad.

The Result The Misadventure:
After a few nails, I started to see some stained beads in my jar. I didn't know if I got them from doing DIPPER-DI-DOO-DA or HUMPTY DUMPTY but in any case, it's pretty simple to fix them.
With a moist finger, pick up the stained beads. Roll them a few times around a polish remover-soaked pad.
Done!
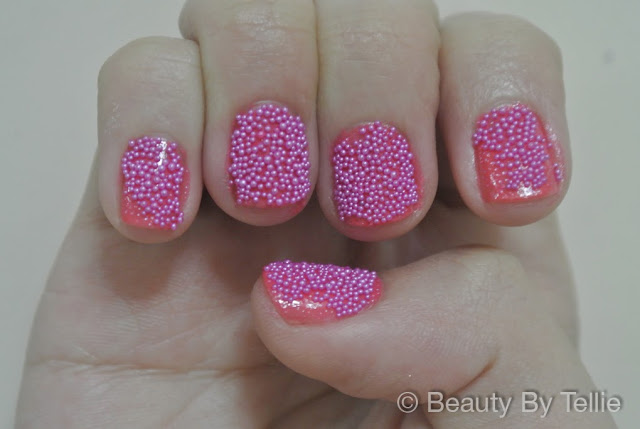
And now, presenting, my caviar nails!

Yeah. They kind of leave much to be desired. They're such a far cry from the Ciate ads but I guess that's the power of expert manicurists and photoshop.
 |
| Ciate ad |
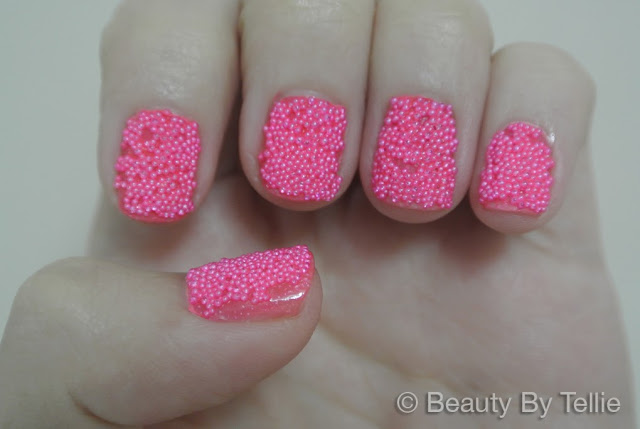
Before ending my little mani sesh, I decided to top my left hand with a clear coat of polish to see if it will smoothen out the texture and help with longevity.
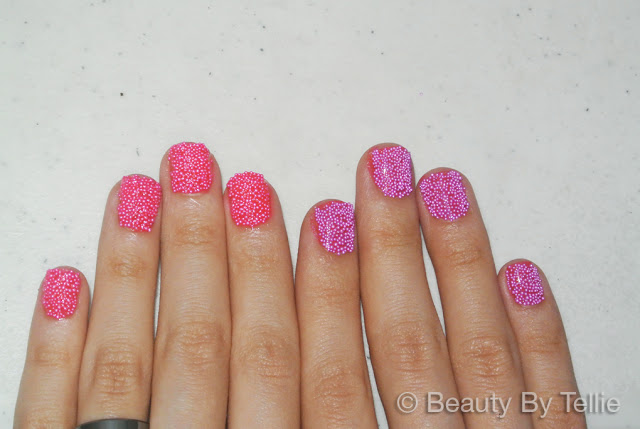
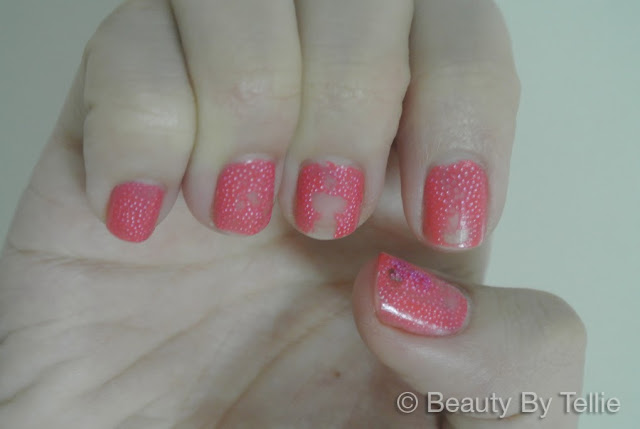
Err. Apparently, the polish melted the paint off the caviar beads and turned it this strange fluorescent pink. Oh well.
Did It Last?
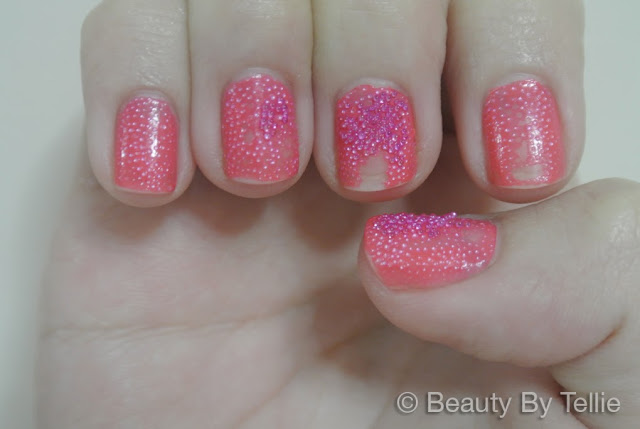
I did this probably around mid-afternoon and took me 'til early evening. Here are the pictures of when I got home late that night. The "sealed" hand fared pretty well. No extra beads came out except the ones that I clumsily knocked off while the polish was still wet.
FYI: The corners and sides of the nails are highly susceptible to getting picked off while the mani is still wet.

The unsealed hand doesn't look anywhere near presentable.
Some of the beads would pick off simply with me finger-combing my hair. Or even just touching the remote.
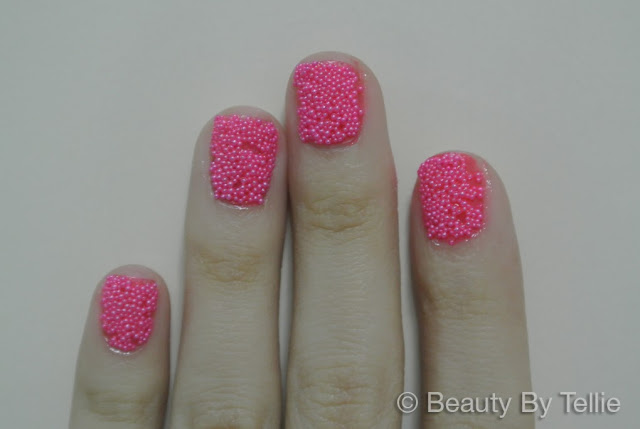
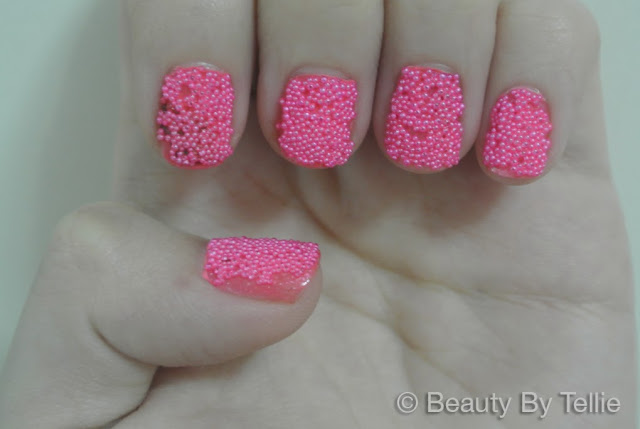
DAY 3 PICS:
Spot the difference with the first one. I don't even think there's any! Ok, well maybe the messy mess of clear coat on my skin mostly came off and that one annoying bead at the corner of my thumb came off.
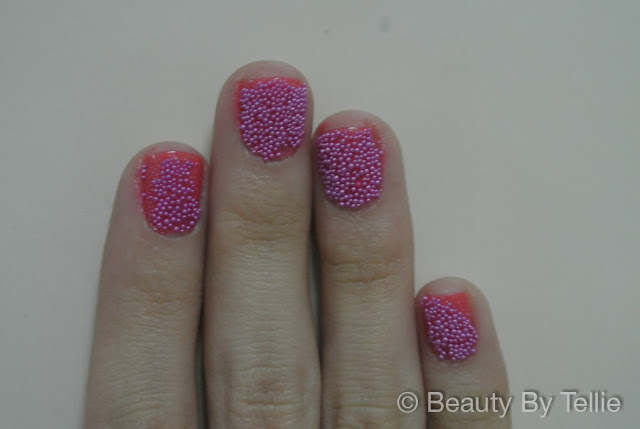
My unsealed hand is even MORE EMBARASSING. Yet, I'm thinking that disco golf ball effect is a pretty hot look to try on when I'm done with the caviar. Maybe I should've done a thicker base so it wouldn't peel off, like with the pinky. If I seal that with clear coat that'll be a unique mani!
I can't figure out why the beads suddenly turned glassy. They're supposed to be pearly.
DAY 7 PICS:
I ACCIDENTALLY FINGERED MY DISH OF NUTELLA AND IT'S DISGUSTING! Still, not a lot of change. Who knew cheap-o Caronia could hold caviar so hard?
My nails aren't normally shy (though they should be!) it's just that my camera wasn't really cooperating with me and the only focused shot I had was this one. There's a small patch of beads left on the thumb and not much else, except some Nutella stain, again. I will admit I chipped of patches on my middle finger due to stress, but they all came off pretty easily.
FINAL THOUGHTS:
- Caviar Nails are too much effort. Save it for an event- it's definitely a conversation piece. And you should start the morning of the event so it'd be dry in time for an afternoon or evening thing.
- Just because the beads are dry, doesn't mean the polish is. Treat it like you would treat your wet nails or the beads will get picked off. I normally try (but fail) to take extreme care up to six hours after the mani and that's about when my caviar beads stay put.
- Pour slowly to "fill" the nail more.
- Patch test if you plan to paint a clear coat over your caviar nails. The polish might react with the beads.
- Want to sport the look but are too lazy to do it? Consider doing it just on an accent nail, such as your ring finger.
- I'm glad I didn't invest in an expensive caviar set. This department store alternative did fine and I got more colors to boot! I think I can do 3 more sets of ten fingers with the leftover beads. More than I expected!
- The top coat-sealed mani WAS SO DIFFICULT TO REMOVE. It took an hour to get everything off and my fingers felt raw from trying to soak and scrub the caviar out!
Caviar nails are a huge pain. They're a huge hassle to put on and take off. They made my fingertips really scratchy and the only redeeming point was that it made back-itching so much funner. It was a horror to pick my nose, though. I kept freaking about inhaling a bead. (I didn't.) JUST KEEPIN' IT REAL GUYS.
Regardless, it's a soothing time-waster and I'm weirdly game to try it all over again, knowing what I know now :) Of course, I may just try to perfect an accent finger or two. I don't think I'll do all ten nails ever again.
Would you wear caviar nails?