

I missed doing How To's soooo much. I feel like I've been on an unboxing roll and then I got started on a few makeup reviews and I'm getting sick of being defaulted to skincare reviews because of my camera incompetence, but How To's haven't been getting a lot of love on my blog lately!
Well. Let's remedy that.
I've been meaning to do this post for ages and I'm so glad I can finally share it with everyone. But first, a quick feature:
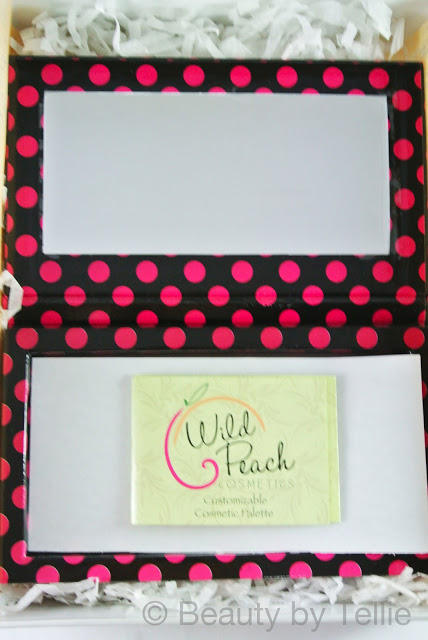 |
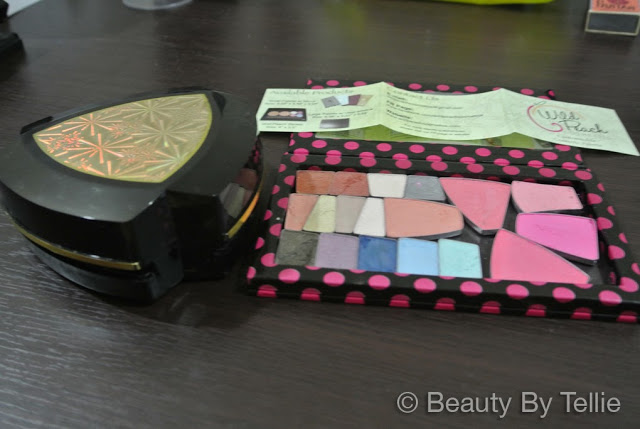
| Wild Peach Cosmetics Customizable Palette |
These customizable palettes are quietly trickling in to the market. I haven't seen them in any brick and mortar stores but I have spotted a few suppliers, local and foreign, through online markets.
The idea is to depot your makeup, place magnetic stickers at the bottom of each makeup pan and arrange them on the magnetic bottom of the customizable palette! Most customizable palettes work that way; I haven't seen anything else with a different concept.
What Is Depotting?
Before I got into beauty, I always thought it'd be a great joy to pick out the makeup pan (I didn't even know the term pan back then) and do your face using just that thin slab of makeup. Yeah, yeah. This totally goes back to my thing of liking miniature stuff.
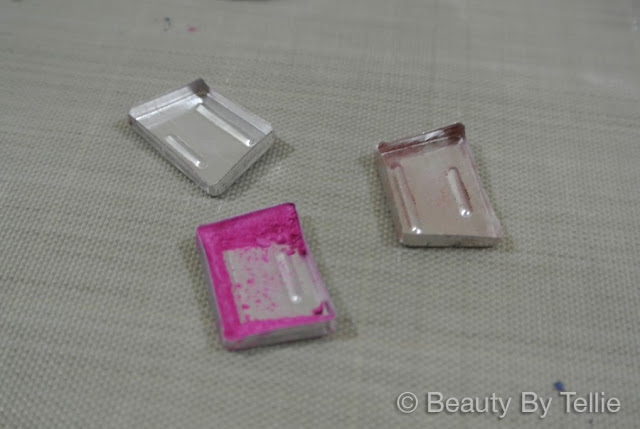 |
| Depotted Makeup |
When I got into Youtubing beauty blogs about six years ago, another word was added to my beau-cabulary. Depotting is the process of picking out the most basic packaging of your makeup. For pressed powders, you should just be left with that thin metal base, or the pan. Some people depot lipsticks too, but that's another story.
- Appoint a sacrificial lamb - It must be done. The art of depotting has such a steep learning curve and you're bound to eff up at least your first two. Start practicing with a small piece of makeup or at the very least, something cheap and not worth crying over.
- Read How Tos and watch a couple of vids - Learn from the mistakes of others. I skimmed through a few but didn't read any of them carefully, resulting in very elementary mistakes.
- There is no hope in going back to the original case.
- It's messy.
How to Depot Your Makeup:
Since I just skimmed through the stuff I saw online, I missed out on a few dumb stuff. If you want to avoid being a dunce, take advice from a fool. We're experts on the matter :D
Here's the fool-proof version of how to depot your makeup:
STEP 1: Gather all your materials
STEP 2: Disassemble your makeup down to that part that surrounds the pan.
- Makeup to be depotted - my sacrificial lamb is this mouldy, oldie palette. Around ten years old, I think.
- Marker - if you want to identify the brands and shades you put in
- Box cutter - something razor sharp yet sturdy enough to pry pan off the case
- Candle - a heat source
- Alcohol - for cleanup
- Long Tweezers - or at least a towel, to make sure you don't burn yourself
- Desk cover - to catch all the pigmented clutter and soot from the makeup cases. Optional.
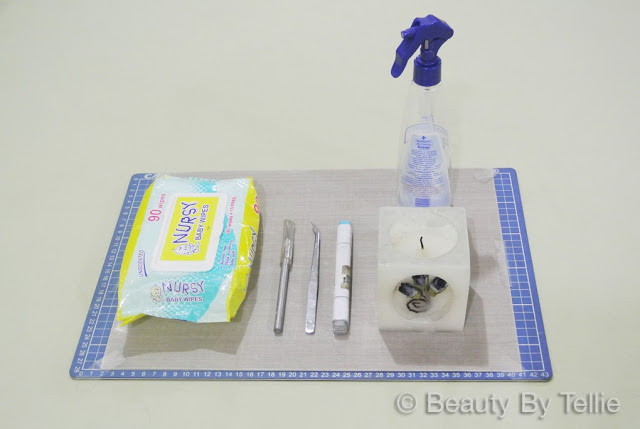 |
| Materials for Depotting Makeup |
Some cases have an extra plastic pan surrounding the metal pan. Pick that off. As for me, working with a clunky palette just meant I had to unhinge the different levels. That's the most basic I can go.

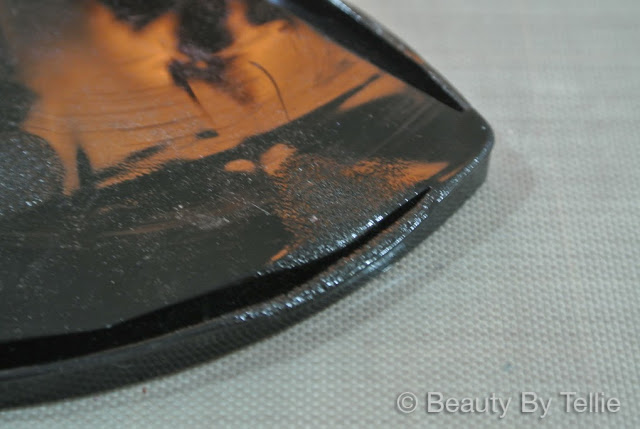 |
| Got impatient and held it too close to the flame... |
- Hold the blade straight. If you're angled inward, you could deform the pan and crush the pressed powder.
- If there's some resistance, the glue is probably still semi-solid. Repeat step 3. DO IT.
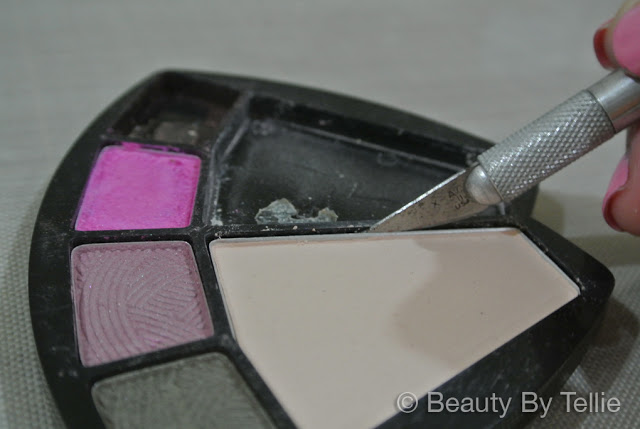 |
| There's not much wiggle room. Be careful! |
STEP 5: Wipe the rest of the glue off the base. I used a baby wipe with some alcohol. Normal tissue shreds too easily.
STEP 6: Label your pans by brand and shade. I didn't do that because this palette had no shade names.
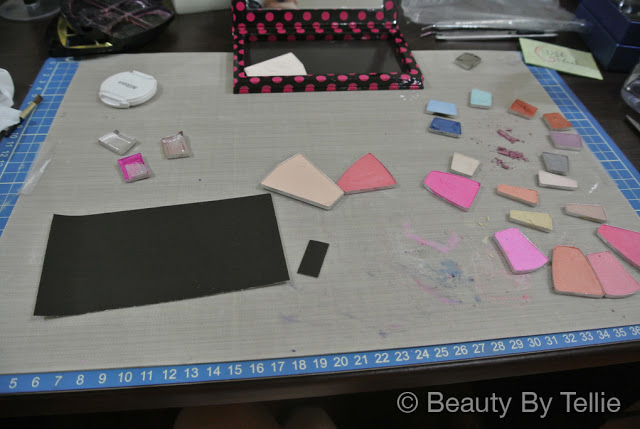
STEP 7: Cut little squares of the magnetic stickers and stick the sticky side at the bottom of the pan. Arrange your palette!
 |
| Messy! |
TIPS:
- There should be no resistance when you pry off the pan - I cannot stress this enough. It should smoothly and easily pop out. If it seems to be stuck, then the glue is still too solid and needs a little bit more time under the heat. If you try to force the pan out thinking that that's as good as it gets, you will most likely bend the pan and crack the powder.
- Loosen it from four sides before trying to pick the pan out.
- You don't need to cut out the full outline of your pan. An itty bitty square of sticker is enough to secure your makeup :)
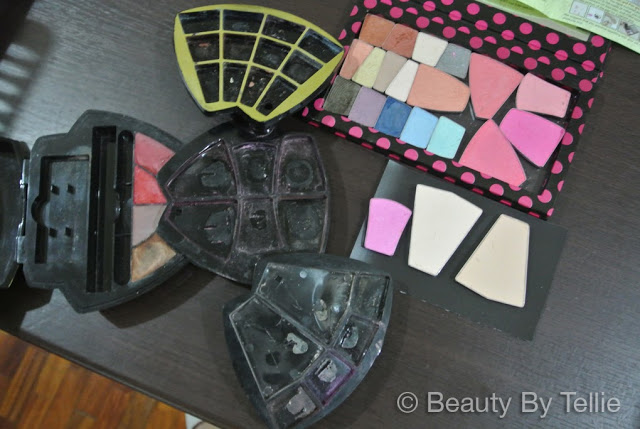
The Result: My WPC Palette
 |
| Custom Palette: From Old to New |
 |
| Custom Palette: Saving Space |
Waaaay more space saving than my former palette. I couldn't be happier to throw that chunky thing away.
I basically sacrificed this ten-year old palette so I can be confident enough to do this on any of my current faves. Oh the possibilites!
I basically sacrificed this ten-year old palette so I can be confident enough to do this on any of my current faves. Oh the possibilites!
Would you want a customizable palette or are you happy with separate compacts?