
Geeking Out: Makeup Brush Shapes and How They Affect Technique
One of the things makeup enthusiasts seem to get so lost about is choosing the right brush. At least personally, I used to just think that a good brush was all about quality~! price~! fluffiness~! animal hair~!
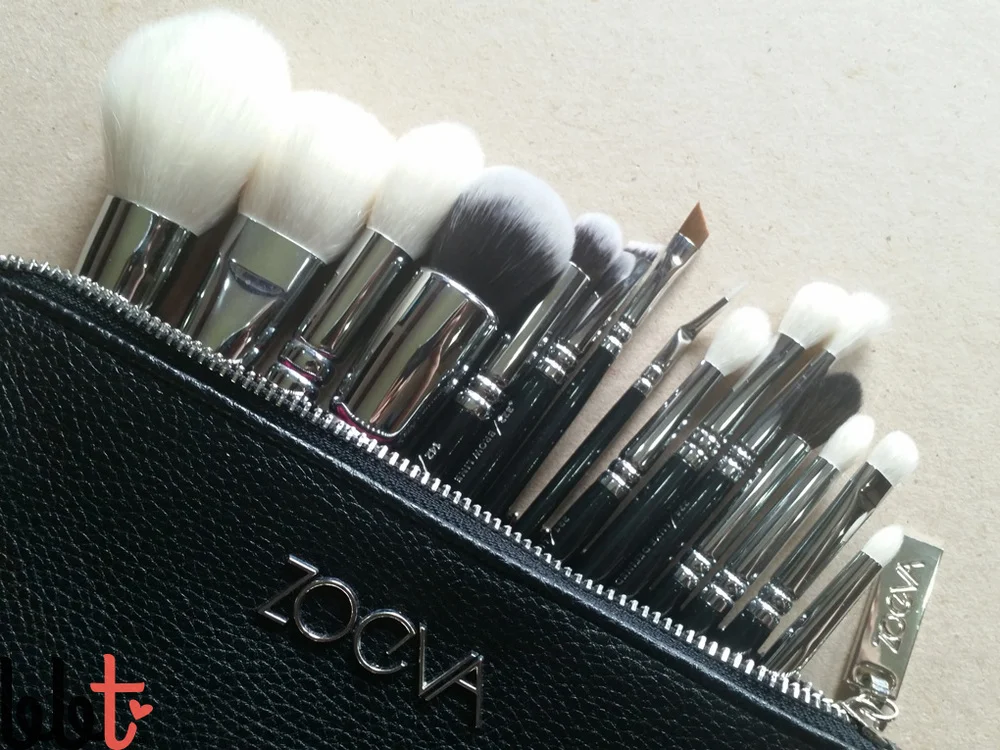
Times have changed. When I reviewed my Ellana Minerals Kallista Brushes, I talked briefly about how new-age synthetics are nothing to be scoffed at. Make Up For Ever brushes are 100% synthetic, and they're the best set in my kit right now. I have 21 in that set, and it's useful to have that much when working with a variety of products, on a variety of models and in a variety of skin tones. The set comes in a wide range of shapes which actually adapts to a wide range of techniques. As corny as it sounds, the brushes really are an extension of my hand, and understanding them fully helps me create a more mindful look.
Parts of a Brush

I never knew that there were actual names for specific parts of a makeup brush. Fine artists have brought these terms into the makeup artistry discussion, and I am grateful for it! I find that naming these things and communicating how they limit or assist makeup application helps artists refine their techniques.
Handle - can be wood, acrylic or any other material. The only thing you have to watch out for with wooden handles is to avoid soaking them, so the handles don't swell up with water. Some coats and paints may chip easily, so it pays to inspect that if you plan on keeping brushes for decades, as I know some people do. The length also affects usage; personal brushes are okay with short handles especially if you need to get closer to mirrors. On the other hand, it's good to keep longer ones for professional use so your fist doesn't hover too closely near the client's face.
Where the handle swells can also affect your grip and ease of using the brush. For face brushes, I find a swell in the lower part of the handle comfortable, but ultimately not that big of a deal. A good weight is most ideal, as anything too lightweight will be difficult to control.
Ferrule - The metal strip that holds the brush hairs. Aside from the glue, this piece of metal secures the brush fibers to the handles via crimping. It is one of the most important elements of brush care, as it grips and shields the adhesive keeping the hairs in place. Water can get trapped inside, harboring mold and deteriorating the adhesive. Take care not to drop your brushes, as once the ferrules get bent, it ruins the shape of the brush head.
Head - The part with the brush hairs. It comes in all shapes and sizes, and in different materials as well, generally natural and synthetic. Natural bristles have cuticles (those structures on hair that look like roof shingles) so they are able to easily pick up and deposit powder. Synthetic bristles, on the other hand, have smoother shafts (since they are man-made) so they are able to pick up and blend cream/liquid products without much wastage. Nowadays, synthetic bristles are designed to mimic natural hairs and they can adequately handle powder as well.
It's really good practice to find a brush shape that allows you to use only about half of the brush head. This allows you to clean the brushes without damaging or disturbing the delicate adhesive as much.
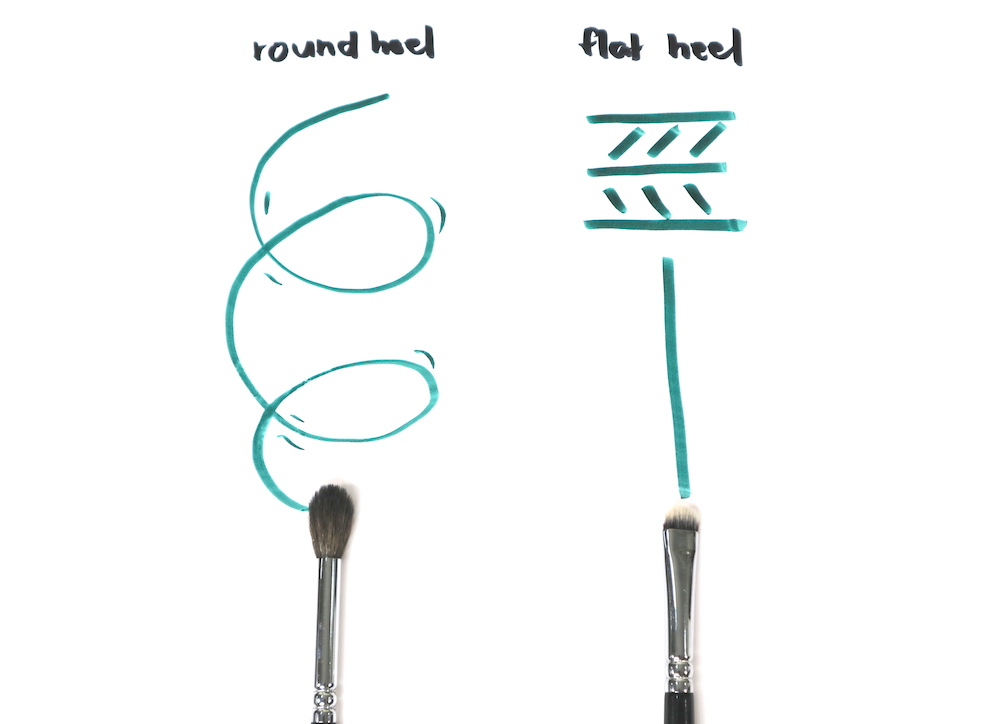
The brush head has 3 parts; the heel, the belly, and the toe. The heel is the part that meets the ferrule. The belly is the widest part of your brush head. Lastly, the toe of the brush is the very tip of the bristles.
In action:
Knowing these parts helps professionals discuss brush needs (and even application techniques) much more precisely and concretely.
A flat-heeled face brush, such as that of a liquid foundation brush's, forces you to use the brush unilaterally; in up and down motions. I love that it helps me cover the face in quick strokes!
In the same manner, a flat-heeled eyeliner brush helps you draw or stamp a straight line by stabilizing your horizontal lines. If I wanted to do a gentle angle or flick, I would choose a round-heeled brush. In my experience, I've found these brushes to make the easiest and most elegant angles!
L: The rounded (black) blending brush can easily do swirling motions.
R: The crimped heel of the smudge brush (duo fiber) flattens the brush head, allowing you to create stable lines.
For different eyeshadow brushes, I've noticed that the heel is the most crucial for me. If I need to go in many different angles, I would need a rounded heel, such as that of an all-around blending brush's, because that goes 0-180, in a half circle angle all across my eyelid. If I need to stamp or pat on color, I would look at flat-heel options to stabilize my hand.
In Make Up For Ever Academy though, the student brush kits had 8 eyeshadow brushes, only 1 of which had a rounded heel! This is because the school believes you display more skill with concealer-type eyeshadow brushes. It sounds crazy, and I did find it had a pretty high learning curve, but I do love the precision of working with concealer-type brushes for eye shadow!
How do you choose makeup brushes? Let me know!


